Hello everyone. I have been away for a while. My husband works out of town. He is normally gone four weeks at a time and only home for two weeks. So, when he is home, I tend to put my focus on him, and not so much on my blog. But now he has gone back to work, so I am once again sitting in front of my computer and typing my words out.
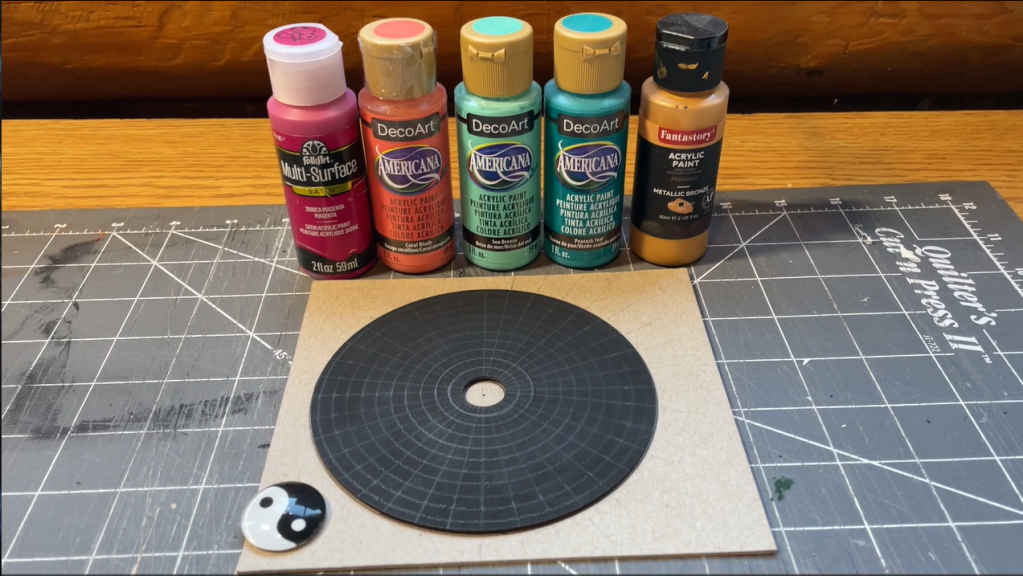
I have spent the last couple of weeks working out how to turn the inside part of a CD case into a functional piece of art. What I came up with was a picture frame. Then the painted CD can be showcased in the very thing that was designed to hold it in places in the case.
How I Made the Frame for the CD Art
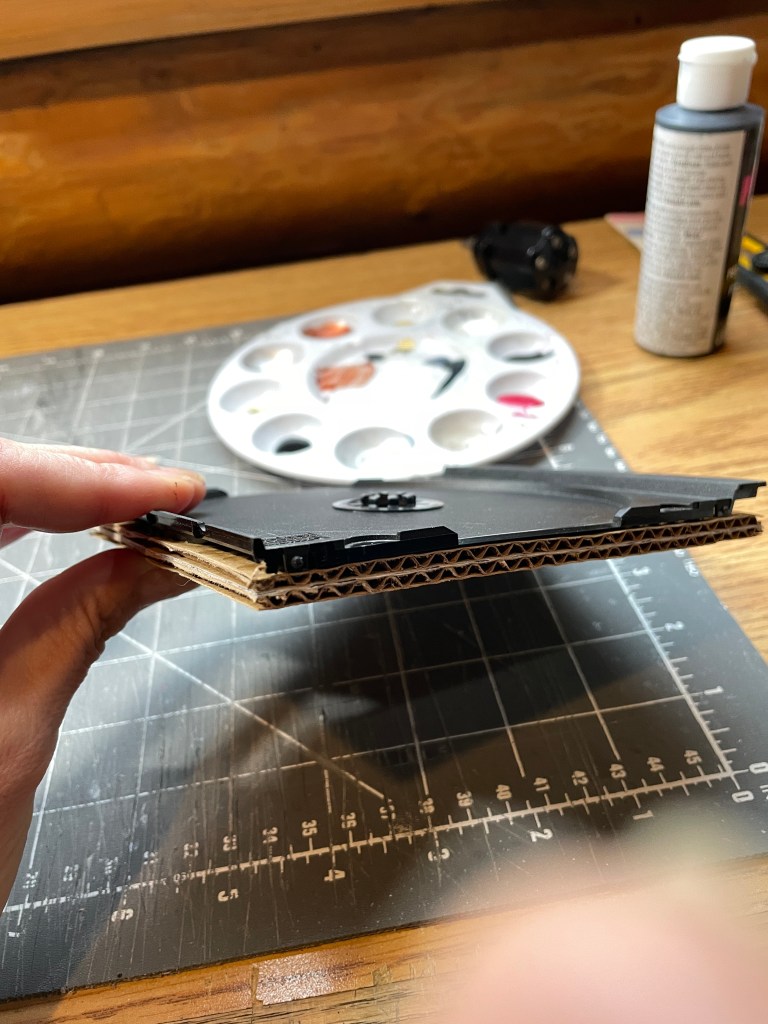
I first had to start by making the little black plastic piece a little thicker. I was able to do that with come cardboard. From there I then cut the balsa wood to frame it. I had to carve a small part out of this initial frame in order to allow the CD to sit inside normally.
Then I had to cut another frame out, here I cut two pieces and glued them together. This made them thicker around the edges of the frame. I used wood nippers to cut the miter cut, and sandpaper. Once all that was glued to the frame, I then glued a piece of balsam wood to the back and used books to weigh it down and hold it in place until the glue set.
The next step was sanding. A whole lot of sanding.
The top frame was made using wood, wooden skewers, and twine. That took a while to do as you must allow glue to set. I glued the wooden skewers to the measured piece of wood and once dry I measured it, then did the miter cut. After that I glued the twine in between the wooden skewers and allowed that to dry well before turning over and following the wood cut, cut the extra twine off.
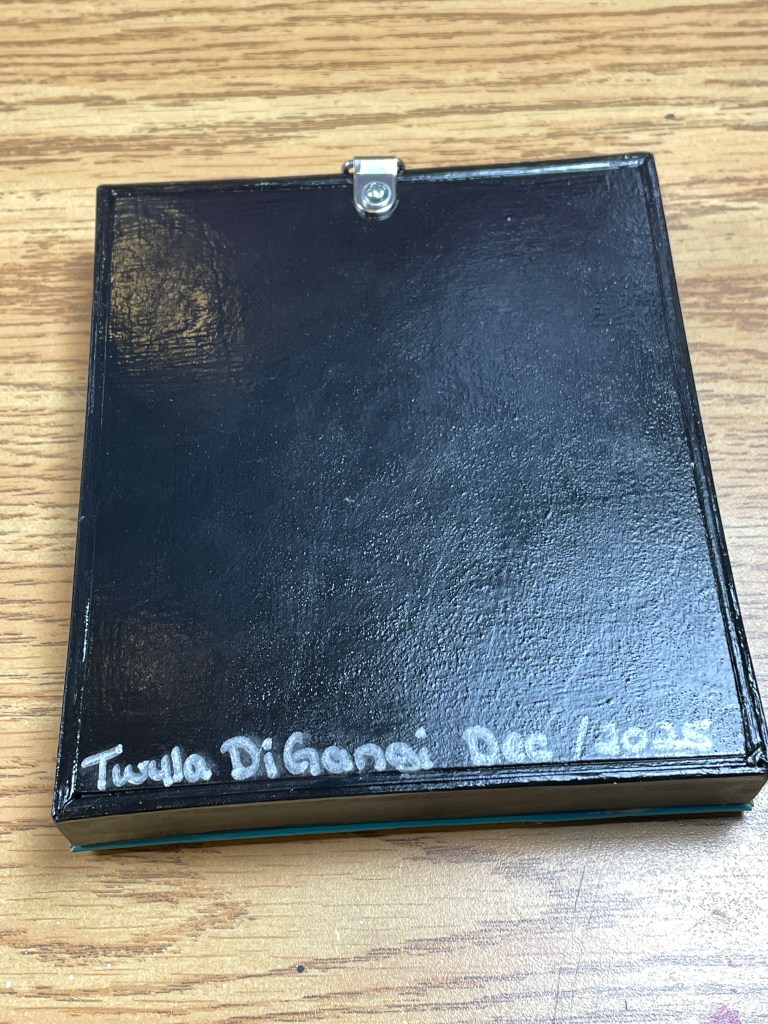
Then you must place the CD into the holder before you add the top frame. This is because the top frame is just a little wider and if you add it first you won’t be able to get the CD inside. Once the CD is placed inside the case you can then glue the top frame into place. Once all the glue has dried completely, I then coated it in clear coat and added the hook on the back to be able to hang it.
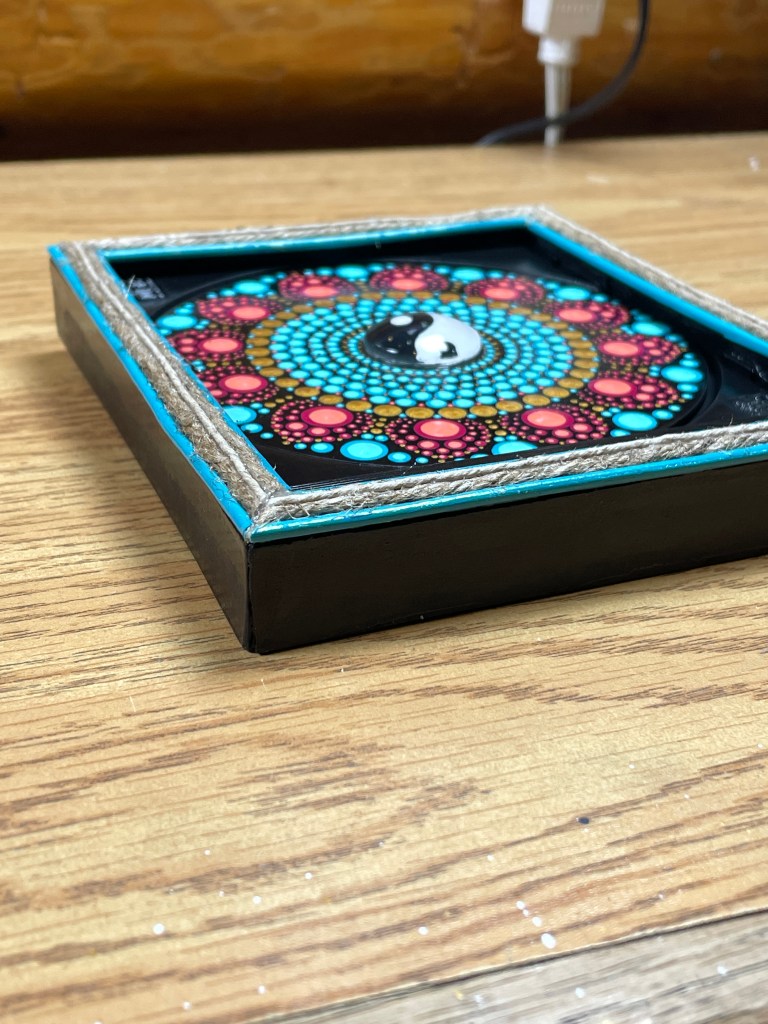

The Finished Project

I will admit the finished product looks pretty good. But it is very time consuming to make. There is a lot of drying time and sanding with this project. I look forward to making more in the future. Who knows, I may be able to set up a table at a craft fair next year and see how they sell.
You can watch the whole process on my YouTube Channel:
What is next?
While grocery shopping, I had done my best to buy things that came in glass bottles or recyclable plastic containers. And let me say that it is not as easy as it sounds. Anything I had to purchase that didn’t have a glass option has now become a ‘What can I make with this’ item. I am lucky to live in an area that does accept almost all types of plastic containers. So, all my frozen vegetable bags and yogurt containers are accepted.
Yet I noticed that in the produce section we are still only offered thin plastic bags. I am surprised that they didn’t make those hard to get when they took away the plastic grocery bags. Bags I have since found out are just a fancy polyester, which is a type of plastic. So, I am hoping to get the time soon, in between my chores and painting, to start making my own produce bags and eventually grocery bags from natural yarns like cotton and bamboo. Once I do, I will be sure to share pictures.
Is there anything you do to reduce plastic when grocery shopping?
So hopefully all this makes sense LOL. And I need to get back to my other projects and get the chores started for the day. I hope that everyone has a great week, and I will try to be better at posting more often. Until then have a wonderful day 😊
In the meantime you can watch my projects on my youtube Channel TrashFree Tales Thanks 😊

Leave a comment